top of page

LEtter Name Cards

Here, you will find everything you need to succeed with using the letter name cards with your children. The letter name cards are a tool to help teach individuals with dyslexia letters and how to pronounce their names.

How the cards work

Letters

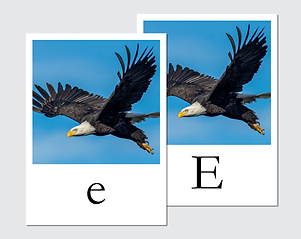
Each card has a letter, lowercase on one side and uppercase on the other. The goal is to become proficient in identifying and saying the name of the letter presented on the card.

Pictures

Each card  has a picture of something that requires you to say the letter on the card. For example, "A-pron" or "U-nicorn".

Reinforcement

The combination of the letters and the coordinating pictures assist to reinforce learning the names of the letters.

Instructions

Beginning Reader (Prior to Kindergarten or in Kindergarten)

Choosing Cards

Time 5-10 minutes

  1. Decide on the letters you plan to work on with your student. Cover the picture with the blank card so that they don’t use the picture clue. We recommend working on no more than 5 at a time and starting with capital letters, only working on the letters they can’t identify. The order of letters we have been successful with is 1. A, B, F, M, P     2. S, T, I, C, G     3. H, L, N, R, O    4. D, J, K, V, Z       5. U, W, X, Y, Q, E 

  2. Find the first letter you plan to work on in the deck (there will be several options). Work with your student to choose 1 card to work on that letter with. The picture should cause your student to say the name of the letter. If it doesn’t, you can tell them what it is, but may consider using a different card. For example, one of the letter A cards has an “A-corn”. If your student says “nut” that card may not work. 

  3. Once you have chosen a card for that letter, plan on keeping it. Changing out the pictures could cause confusion. Only use ONE CARD for each letter. The other cards for that letter will remain unused. 

  4. After choosing the cards to work on, review what each picture is and the name of the letter. 

Practice

Time 1-3 minutes each day

  1. Use a blank card to cover the picture and only show the letter. Give them 3-5 seconds to think of the picture and name (eventually hoping they just say the letter name). If they can’t remember either, try to show your student the picture before they guess. 

  2. If your student recognizes the letter 5 different days without looking at the picture, they can be finished with that letter. 

  3. Go through the whole alphabet with capital letters.

  4. Start the process over for lower-case letters, using the same pictures they used for capital letters. Use the same order suggested for working with capital letters.

1st Grade and beyond


  1. Follow the same steps for younger students. 

  2. The main difference is you may want to start with lower-case letters. An older student may be able to handle practicing with 5-7 cards at a time.

Tips and tricks

  • There aren’t as many options for some of the trickier letters so you may have to practice helping them know what the picture is. For example, the letter “H” has a picture of water, which we would say is H2O. Showing the student the short clip where the fish in Finding Nemo says, “I’m H2O intolerant. Achoo!” and explaining how that is a joke helps them connect and remember H2O. 

  • Tape the cards around the house and have them say the letter name. For example, tape one on the refrigerator and have them say the name of the letter before they open it. 

  • Create your own card that is relevant to you. If the child has an “Uncle Dee”, you can attach a picture of him next to the letter “D”.

bottom of page